Create a New ZK Project
Video Guide
http://www.youtube.com/watch?v=Gm0IfIYa2PU&NR=1
Create a New ZK Project
-
Click [File]/[New]/[Other…]/[ZK Project] in Eclipse main menu.

-
Type the project name. Eclipse will automatically include the default ZK package configured in the ZK Package preferences, however, you can select another installed ZK release by “ZK Verstion” drop-down list. Then, click Next.

-
You can modify the Source folders and Default output folder if you like. Then, click Next.

-
You can modify Context root or Content directory if you like. Then, Click Finish.

-
After clicking Finish, the New Project Wizard will setup the ZK Project ready for development.
Tips:
-
The project icon’s top right corner includes a ZK mark which indicates that it has ZK Studio supported:

-
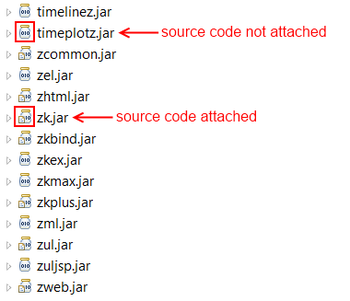
The ZK package source code will be automatically attached to the related jar files
Creating a New ZUL File
Using the ZUL File Wizard
- There are two ways to open the New ZUL File Wizard:
-
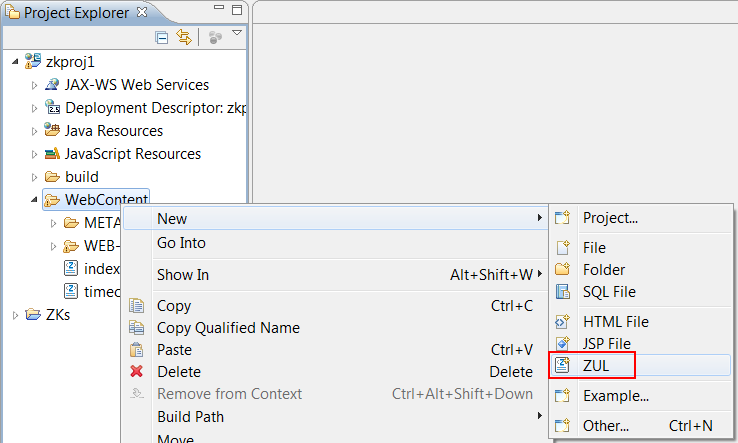
Right click on a dynamic web project in “Project Explorer” view or “Package Explorer” view and select [New]/[ZUL].
-
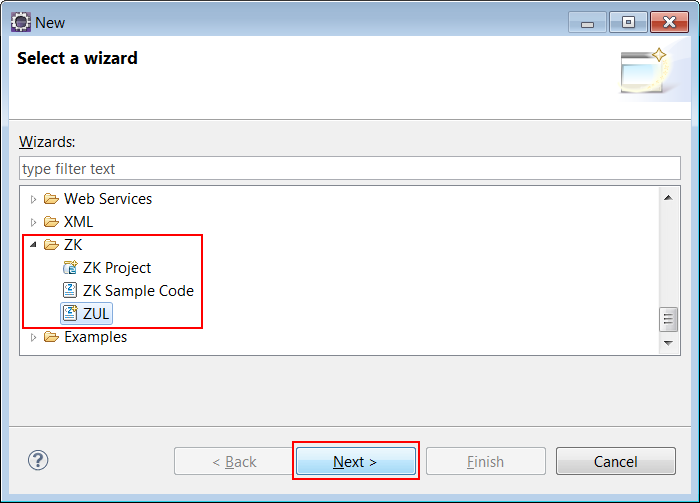
Click [File]/[New]/[Other] in Eclipse’s main menu and select “ZUL” under “ZK” node then click Next.
-
-
Type the file name and optional page title, click Finish.
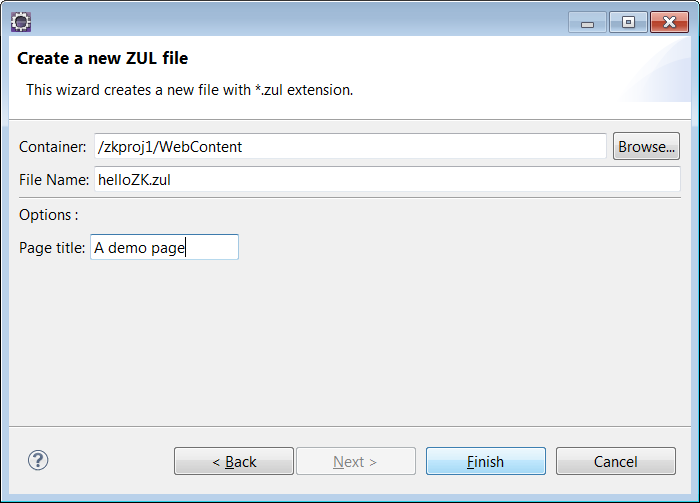
- The newly created ZUL File will be opened in ZUL Editor.
Using the File Wizard
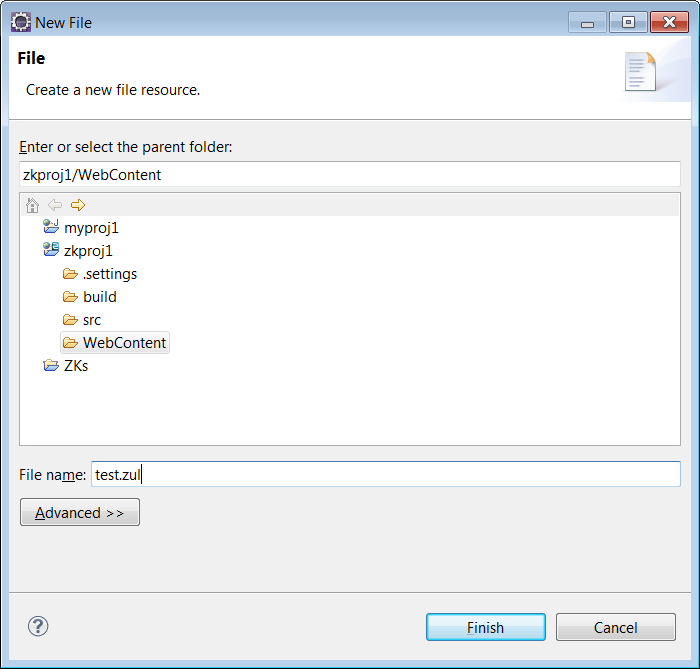
You can create new ZUL file by selecting the [File]/[New]/[File] in Eclipse’s main menu.
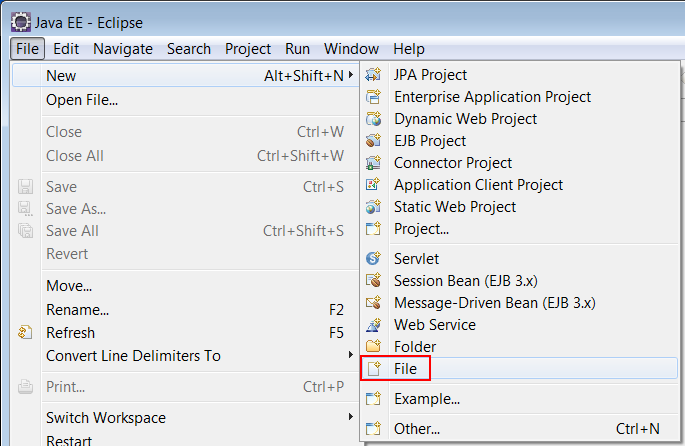
However, you have to enter the “.zul” extension by yourself and the newly create zul file will not contain any sample code.
Running the ZK Project
1. Right click on the MyApp project in explorer and in the Menu dialog select Run As / Run on Server

2. If you have not defined a server before, Eclipse will show a dialog with “Manually define a new server” option selected. Then Select Apache / Tomcat v6.0 Server in the “server type” area and then click Finish. If you haven’t created a corresponding “server runtime environment”, please refer to WTP Tutorials – Building and Running a Web Application.

3. Eclipse will display the result in its internal browser or you can view the result in your browser.

Tips:
There is a detailed step-by-step tutorial on using Tomcat with Eclipse here: http://www.coreservlets.com/Apache-Tomcat-Tutorial/eclipse.html